There was a time when phone camera software, that allowed taking pictures, had just one or two options. But as the hardware responsible for taking pictures improved so did the software behind it. These days you can adjust practically every parameter of the shot before you take it, similar to the way you can on a proper camera. From things like white balance and exposure to ISO, shutter speed, metering modes and much more.
For the layman, these terms can be quite daunting and thus most people don’t seem to bother with them and just choose to point and shoot. But while this may give decent results most times, you’d be surprised how much better you can make your shot if you just spend some time adjusting a few settings.
Here, in this multi-part series, we will be taking a look at some of the settings you commonly find on phones and how you can use them to get the most out of your photos.
In the first part of this series we tried to understand about camera resolution. Now let’s find out about another important aspect of digital photography i.e., exposure.
Exposure
A photograph’s exposure determines how light or dark an image will appear when it’s been captured by the camera.
Exposure refers to the amount of light that is let into the sensor on your camera. The more light you light in, the brighter the resulting picture. Conversely, the less light you let in, the darker the picture. How much light is let in is determined by three camera settings: aperture, ISO and shutter speed. However, the camera app that comes pre-loaded with most of the smartphones combines all three of them together under one setting named ‘Exposure’.
Exposure or Exposure compensation, is where the camera allows you to increase or decrease the exposure over what it assumes to be the ideal exposure for a particular scene. It allows you to overexpose or underexpose a scene as desired over the default value. You will see the default value as zero in the middle on the exposure scale, and you can increase or decrease it in stops like -2, -1, 0, 1 and 2. In simple terms, it lets you brighten or darken a scene.
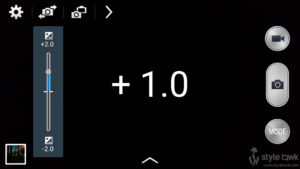
At times a camera may overexpose a scene by default. This is where you can use exposure compensation to dial down the exposure a bit and achieve correct level of illumination for the scene where things are neither too bright with clipped highlights nor too dark. It is one of the more useful tools available on a camera and wise use of it can achieve really good results.


